LabVIEW User Interface – Radio Button

Radio Button is very useful for build a button with more status and when you want to see to the user the two actions of boolean separated. As a Listbox in labview is a good way to create vertical Menu, with radio and some customization we can create both vertical or horizontal menu.

The only thing is not extensible at runtime as the listbox or table.

In this article we explain how customize a classic radio button in labview, to have FLAT Button with a decalc icon and text.

Labview radio button

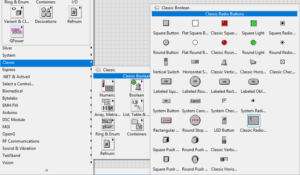
Step 1: Add a radio button from classic palette.

Labview radio button

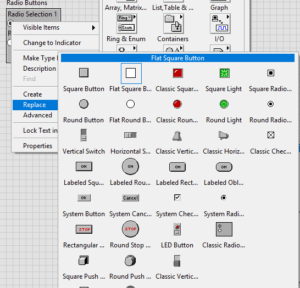
Step 2: Change Button with Flat Square Button

Labview radio button

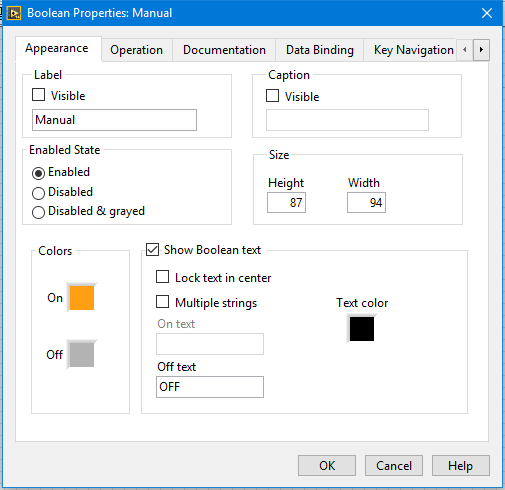
Step 3: Change Property of Button.

Change the Color ON/OFF, unselect lock text in center and Multiple string.

Step 4: Use the select tool to select both the text boolean text and place to give the space for decal picture.

Step 5: Customize the single Button

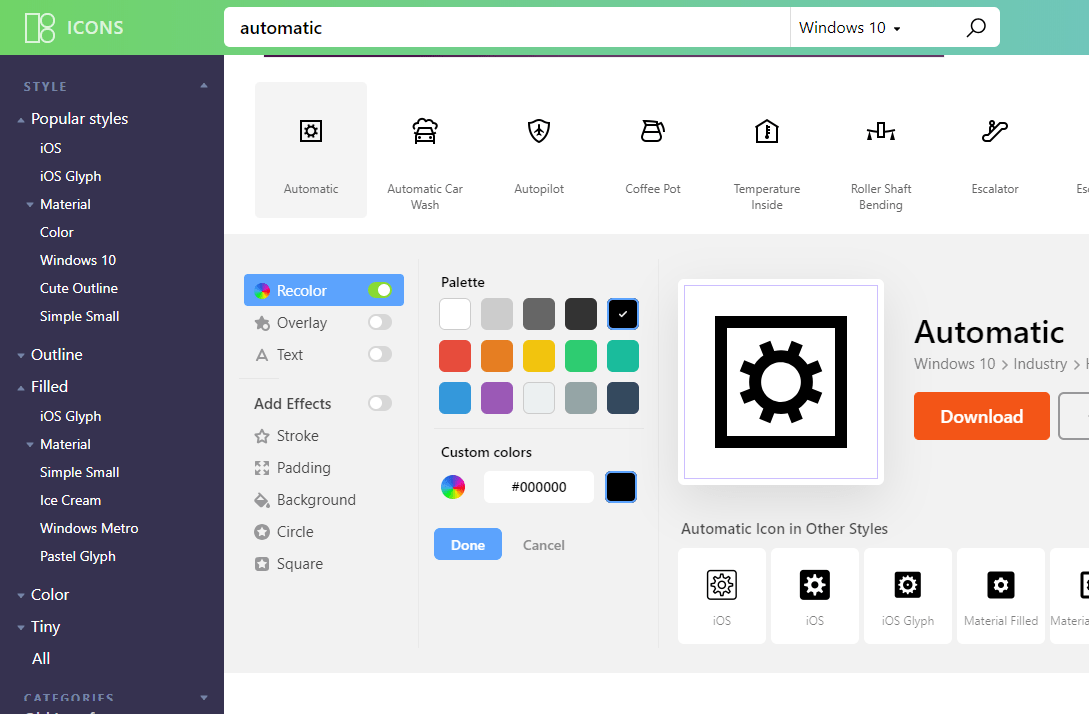
Step 6: Get icon and customize.

ICON8 (icons8.com) is our favorite repository for icon, there are different kind (windows,Ios,colored ans so on), and you can customize the icon before download. In our case we search for automatic icon in windows 10 style, then customize with recolor in white and download the 64px.

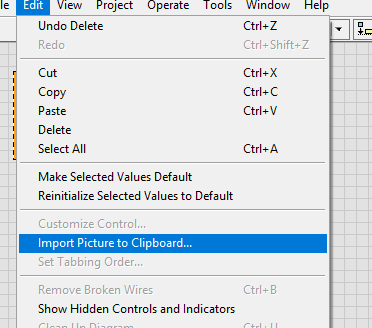
Step 7: Import Picture to clipboard

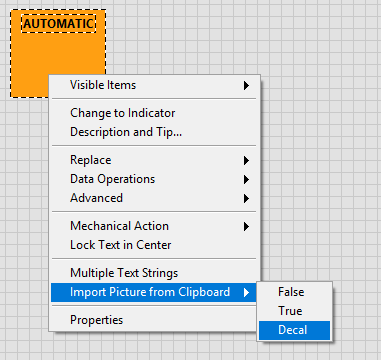
Step 8: Import from clipboard as Decal

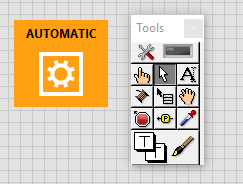
Step 9: Place Decal in wished position. Close control and confirm replace the original control.

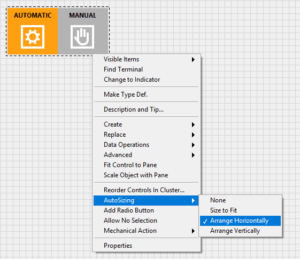
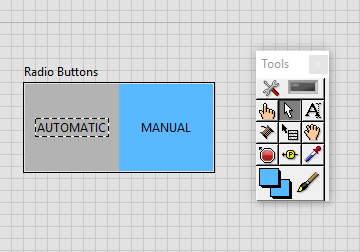
Step 10: Repeat Step 5-9 for other button. Autosizing/Arrange Horizontally. Paint transparent the board of radiobutton container.

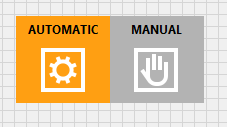
Your TwoButton Status is ready.

Remember to label with sense each single button.

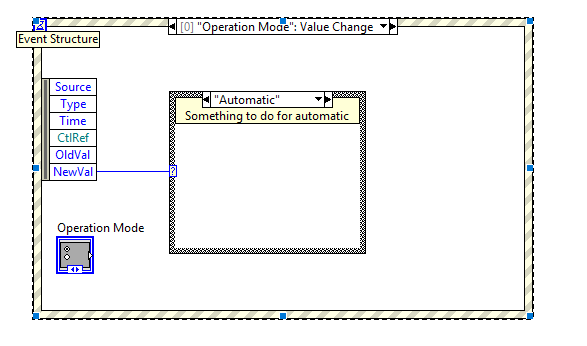
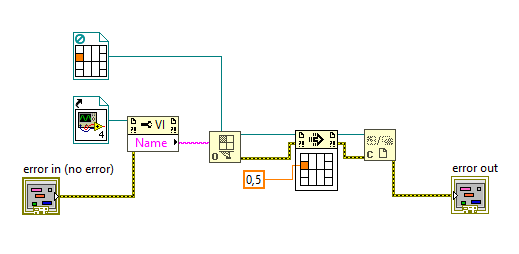
Now the diagram, like an enum you have more readable case status, and you can add other cases to your button.

The article explain how you can change your interface, and the useful of radiobutton for user experience and readability of code. We will prepare a next article in witch you can see how you can add button programmatically.

Ora puoi approfondire questo argomento con uno dei nostri corsi HandsON.

Protocolli Industriali con LabVIEW

Scoprire i protocolli industriali, come integrarli in labview. In questo corso impararerai a implementare toolkit e librerie, per utilizzare protocolli come ModBus e OPC-UA
Intermedio

Liv. Intermedio

OnLine; Con Istrutttore

3 gg

LabVIEW UI/UX

Lo sviluppo di applicativi per Testing e Misure vede sempre più una necessità di integrare interfacce curate soprattutto in prospettiva dell'utilizzo da utenti meno esperti e nel considerare di ridurre errri e incertezze dovute spesso ad un interfaccia poco chiara e intuitva.
Intermedio

Liv. Intermedio

OnLine; Con Istrutttore

3 gg

Corso LabVIEW StateMachine Pro

Il paradigma di programmazione convenzionale è il data flow. Siamo abituati ad usare il cluster di errore per gestire la sequenza di esecuzione dei nodi in labview. La macchina a Stati, permette di gestire l'ordine di esecuzione condizionato all'uscita dello stato in esecuzione. L'implementazione di questo pattern permette quindi l'integrazione del diagramma di stato e una razionalizzazione dell'applicazione, diventando più flessibile, leggibile e manutenibile.
INTERMEDIO

Liv. INTERMEDIO

In Presenza

1 gg

Scopri i nostri servizi e Prodotti, Contattaci ora!

Altri articoli dal nostro Blog

Per diventare un programmatore LabVIEW esperto, è necessario dedicare diversi mesi o anche anni al perfezionamento delle proprie competenze. Questo processo include l’apprendimento di funzionalità avanzate come la gestione dei dati, l’interfacciamento hardware e l’ottimizzazione delle prestazioni.
LabVIEW, un ambiente di programmazione grafica ampiamente utilizzato per il controllo e l’automazione, offre potenti strumenti di sincronizzazione come eventi, code e notificatori per gestire la comunicazione tra processi paralleli. Tuttavia, quando si affronta la gestione del timeout su funzioni di sincronismo, è cruciale adottare strategie efficaci per garantire la reattività del sistema.